Cooking At Home: The basic but tasty coleslaw


I've tried making a few different coleslaws in my day, none of which I was too crazy about. There was this one coleslaw recipe that I tried that included bits of apples, nuts and gorgonzola! Sounds great right? It probably was, but I couldn't get passed how fancy that coleslaw was. When I envision or think of coleslaw I think of a side-dish that is simple, easy to make, and yet delicious. I think of coleslaw as one of those side-dishes that become a scene stealer by accident, because one wouldn't expect such a simple dish to be so... well... mouth-watering. So, sure that coleslaw may have been mouth-watering, maybe it was a scene stealer, but it wasn't by accident and definitely wasn't simple.

So here I am roughly a year later tempted to make yet another coleslaw dish, this time the tempting recipe is from Alice Waters cookbook, The Art of Simple Food. I've been cooking quite a bit from this cookbook as of late and if there's one thing I know about this cookbook it is that the recipes are indeed SIMPLE and always simply delicious!

Let me first say, that I had to make this coleslaw recipe two days in a row! Yes, the coleslaw was wonderfully delicious and absolutely simple to make. It is coleslaw with minimum ingredients, it is a recipe that takes 20 minutes or less to make, it is the basic but tasty coleslaw, no fancy stuff here my friends just plain old delicious coleslaw. So here you go, straight from Alice Water's Cookbook. Enjoy.


INGREDIENTS (for 4 servings):
1 small head of cabbage, cored and sliced into thin shreds - (You can use any cabbage you prefer, even a combination of cabbages if you like. I used Napa Cabbage that was already pre-shredded and bagged, this worked great and saved time.)

1/2 small red onion, sliced as thinly as possible - (If you prefer to have less onion feel free to add less than 1/2 small red onion. I actually love the taste of onion but found that the regular red onion was too much and so opted to use a shallot instead, this worked in giving the dish a milder onion flavor.)

Salt & fresh-ground black pepper

1 tablespoon cider or wine vinegar - (A wine vinegar will be more mild in acidity and smoother tasting than a cider vinegar. I used an apple-cider vinegar and found that the punchy acid taste was rather pleasing in the coleslaw, although I think that a champagne vinegar may have been more subtle and gentler to the palate.)

1/4 cup good mayonnaise (or 4 tablespoons olive oil) - (I opted to use mayonnaise instead since I find myself to be more familiar with the mayo-coleslaw. If you follow the amounts of the ingredients the mayonnaise is not too overpowering and would even say it is on the lighter side than most mayo-coleslaw I've had in my time. But when in doubt always use less, taste test, and if you need more just add).


RECIPE:
Mix together in a large bowl the cabbage, onions and a large pinch of salt, set aside.

Prepare the wet mixture by mixing together in a separate small to medium size bowl: the vinegar, a pinch of salt and a few cracks of black pepper. Stir the wet mixture in order to dissolve the salt.

Whisk into the wet mixture the olive oil or the mayonnaise (whichever you choose to use). Taste for acidity and salt, add if need be. (If you are using mayonnaise in lieu of olive oil mix the mayonnaise into the vinegar mixture until it is a smooth consistency and no lumps can be seen).

Pour the wet mixture over the cabbage and onions, mix well so the wet mixture is thoroughly incorporated. (I found that mixing the wet mixture into all the shredded cabbage and onions was most easily done by using a spatula).

Eat the coleslaw right away or leave it in the refrigerator for however long you please to develop the flavors. I found that refrigerating the coleslaw for a few hours to develop the flavors tasted best but it's all a matter of preference.



Cooking At Home: Italian Seafood Stew inspired by Giada De Laurentiis' recipe


It's been a long time since I've made the Ligurian Fish Stew, a recipe I got from Giada De Laurentiis' cookbook, Giada At Home. But the cold evenings have gotten me dreaming about warm hearty stew with a side of garlic rubbed ciabatta crostini to go with it. The recipe asks only for white fish but tonight I decided to go a little fancy and also added shrimp!

The fish stew is terribly easy to make and the best part is that the stew is a meal in itself and can easily be made in a larger batch so that you can have leftovers the next night, now that to me is time wisely spent.

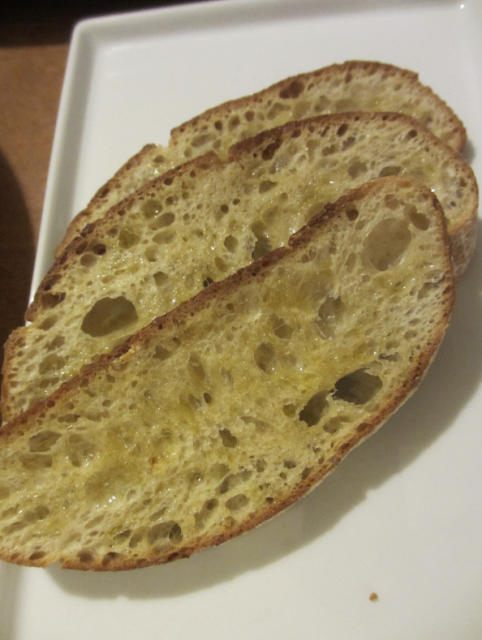
You can easily dip any kind of bread you wish into the fish stew but I find it rather pleasing to taste the crunchy garlic rubbed crostini. The garlic crostini along with the tomato-based fish stew is a perfect match and makes the rather homely and seemingly-humble dinner into something rustically beautiful and exciting, transforming it into a kind of fancy comfort food.


INGREDIENTS (For 4-6 servings):
For the Stew you will need...
1/3 Cup olive oil, plus more for drizzling

2 Medium potatoes, peeled and chopped into 3/4-inch pieces (I used organic yellow dutch potatoes and left the skin on)

2 Medium carrots, peeled and chopped into 1/2-inch pieces (I used organic carrots and left the skin on)

1 Onion, chopped

2 Garlic cloves, halved

Salt

3/4 Cup dry white wine, such as Pinot Grigio

1 (28-ounce) can crushed Italian San Marzano tomatoes (I used a few different kinds of crushed tomatoes in the past to make this recipe and found that the San Marzano tomatoes that is suggested for the recipe has the best flavor.  I also used 2 cans of tomatoes since the amount of seafood I was putting into my stew was over 1 1/2 pounds)

1/2 Teaspoon crushed red pepper flakes, plus more for garnish

1 1/2 Pounds skinless white fish fillets, such as halibut, cod, or arctic char, but into 3/4-inch chunks (I used less than a pound of white fish since I was also adding shrimp to my stew)

1/4 Cup chopped fresh flat-leaf parsley leaves

I also added a whole bag of thawed frozen shrimp from Trader Joe's


For the Crostini you will need...
1 (1-pound) loaf ciabatta bread, trimmed and cut into 14 (1/2-inch-thick) slices (I opted to skip trimming the bread and simply sliced the bread to the suggested 1/2-inch thickness)

Olive oil, for drizzling

1 Garlic clove halved


RECIPE:
STEP 1:  In a 6-quart, heavy-bottomed stockpot or Dutch oven, heat 1/3 cup oil over med-high heat. Add the potatoes, carrots, onions, and garlic. Season with salt and cook, stirring frequently, until the vegetables begin to soften, 5-8 minutes.

STEP 2:  Turn the heat to high and add the wine and scrape up the brown bits that cling to the bottom of the pan with a wooden spoon. Cook until most of the liquid has evaporated, about 5 minutes.

STEP 3:  Add the tomatoes, 1 cup water, and the red pepper flakes (since I was using 2 cans of tomatoes for my stew I added 2 cups of water instead of 1 as directed). Reduce the heat and bring the mixture to a simmer. Cover and cook until the vegetables are tender, 18-20 minutes (I checked to see if the vegetables were done by tasting one of the potatoes, it just so happened that my vegetables weren't fully cooked until about 25-30 minutes or so).

STEP 4:  While the stew is simmering make the crostini. Place an oven rack in the center of the oven and preheat the oven to 400 degrees F.

STEP 5:  Arrange bread slices in a single layer on a baking sheet and drizzle with olive oil (the recipe does not clearly specify but drizzling only one side of the bread is sufficient). Bake until light golden, about 10 minutes (at 10 minutes I found my bread to only be lightly toasted and had not reached the light golden color, I however prefer toast that is not too hard and so opted to take out my crostini at that point even though the light golden color had not been reach. I found at this point my bread was perfect toasted to my taste). Cool for 2 minutes. Rub the warm toasts with the cut side of the garlic.

STEP 6:  Season the fish with salt and add to the stew. Cook, stirring occasionally, until cooked through, 5-8 minutes. (I seasoned the fish with salt before adding it into the stew but did not season the shrimp).

STEP 7:  Season the stew with salt, to taste (if needed, I found that my stew did not need additional salt). Ladle the stew into bowls and garnish with parsley. Drizzle with olive oil and sprinkle with red pepper flakes on top (obviously optional). Serve with the crostini.


Do you know how to cook and peel hard-boiled eggs perfectly?


Ever wonder whether you should be putting your eggs in already boiling water? Whether they should be boiling for 10 minutes or 5 minutes? Ever started to peel those freshly hard-boiled eggs and think 'I hope they're done'?  Well, if you have, now you can stop because I'm going to tell you the secret to boiling the perfect hard-boiled eggs, and when I mean perfectly cooked hard-boiled eggs I mean hard-boiled eggs with the yellows yellow and not a spot of green on them, no over-doneness and no under-doneness, just, beautifully cooked hard-boiled eggs. Another upside to cooking the eggs in this manner is that they peel much easier and cleaner, no nicks or chunks missing from the white! Yay!

So, to cook perfect hard-boiled eggs you need to....

1. Put your eggs in a pot and cover them with cold water, put enough water into the pot to just cover the eggs (about 1/2" or less above the eggs)

2. Put the pot on the stove and bring to a boil, uncovered

3. When the water comes to a boil, turn off the heat and cover the pot with a lid, let the eggs sit thus for 8 minutes

4. After 8 minutes rinse the eggs in cold water a couple of time until they are cooled and then peel


My new breakfast crush, Toasted Bagel topped with Sweetened Ricotta


I've definitely been trying a lot more things since I've gotten pregnant and since I've made my 2013 resolution to live a more exciting life in the kitchen. Just 17 days in and I can say it's definitely working to expose me to new flavors, many of which I thought I wouldn't like but actually do.

I've eaten my morning bagel with the usual cream cheese and even a spread of butter, but today I decided that I wanted a toasted bagel with ricotta cheese! Ricotta Cheese?! Yes, ricotta cheese. I was reading a cookbook the other day that had mentioned ricotta cheese on toast sprinkled with a bit of sugar- I decided to try this today.


I toasted my bagel and spread ricotta cheese on it and sprinkled it lightly with sugar. First bite... interesting. Second bite... I can see how this would be good. Third bite... I love it! I went on to spread  the two sides of the toasted bagel with ricotta cheese with a sprinkling of sugar and devoured the whole thing, with a nice cup of home dripped coffee. 

Ricotta cheese which I've only had in small quantities in raviolis and lasagnas is a cheese still curiously new to me, as with any cheese I eat I'm always a bit hesitant to eat at first. Thus, I naturally approached the toasted bagel mounded with ricotta cheese with care, but I found that the texture although a little scary at first was quite nice, smooth with just a bit of texture that actually makes it a bit fun to eat. And the taste is very mild, almost like cottage cheese, but better. With the mild taste of ricotta I can only imagine endless possibilities of how this cheese can be used as it seems to go with pretty much any flavor you decide to use with it, be it marinara sauce, berry sauce, a drizzle of honey or simply a sprinkle of sugar! 

Ricotta, my new crush.


Magnolia Bakery's Banana Pudding


OMG! < I hate it when people say those letters, "OMG" and even when people write it but Magnolia Bakery's Banana Pudding definitely deserves those letters today, so let me just say those letters I usually never say "O - M - G". And of course I mean it in the most spectacular way possible.


The Banana Pudding is nothing less than heavenly, even if you don't like bananas.

The Banana Pudding is pre-packaged in containers and are available in large and small sizes. The container is filled with chunks of moist bread and lots of smooth, creamy banana pudding. It doesn't look like much at first sight but this is definitely one of those times when that famous old saying comes into play, "you can't judge a book by it's cover", and if you so should you can bet you'll be missing out on probably one of the greatest desserts in Los Angeles.


Cooking At Home: A Hole in One! A delightful breakfast snack fun for kids and ADULTS!


I saw this recipe when I was 15 years old, I had a set of cookbooks for kids, they were filled with basic recipes that were more focused on creating fun to eat foods. I don't have those kid's cookbooks anymore and none of the recipes really stuck, except this one, it's called the Hole-In-One. It's a very basic and simple recipe that is fun to eat and make (for adults and kids!) and of course it's also very tasty.

The Hole-In-One consists of only two ingredients, eggs and slices of bread. The bread can be plain white bread, rye bread, sour dough or etc. whichever bread you choose is fine and will work for this recipe but my preference is to use baguette, I find that slices of baguette gives the overall appearance of this little breakfast snack a little class.


INGREDIENTS(for 2 servings):
2 slices of baguette, cut at an angle to a thickness of roughly 1-inch

2 large or extra large eggs

Salt & pepper, to taste


DIRECTIONS:
STEP 1 Heat a heavy bottomed grill pan or skillet on medium-low heat until the pan is thoroughly heated.

STEP 2 Take your slices of baguette and pick out the bread in the middle creating a hole large enough to fit the egg yolk.


STEP 3 When the pan is thoroughly heated melt a little bit of butter in the pan, enough to coat the pan with butter (this is so that the egg does not stick).

STEP 4 Add the bread to the pan, in each of the holes crack an egg so that the yolk fits inside the hole. Allowing the whites to over-flow onto the top of the bread is fine, and more likely than not this will happen- don't worry it's a good thing, it'll make this dish extra yummy.


STEP 5 Sprinkle salt & pepper onto each of the Hole-In-Ones.

STEP 6 Cover the pan and allow it to cook for about 2 minutes. During this step we are waiting for the egg to just set.


STEP 7 When you feel it is time to flip the Hole-In-Ones, add a little bit more butter to the pan, so the other side of the egg will not stick to the pan when cooking and carefully flip the Hole-In-Ones. Allow the second side to cook for about 1-2 minutes in an uncovered pan. In this step we are waiting for the other side of the Hole-In-One to cook. You can usually tell if the second side is done by looking at the whites on the pan, if the whites on the pan look like they've set the Hole-In-One is ready to be taken out, another way to check if they are done (but this way risks popping the yolk) is to try and gently lift the bread off the pan, if the bread does not come off with ease than the eggs are not yet done cooking and need another few seconds.


The egg white have run over the the rest of the bread and has created a beautiful layer of egg on top of the baguette. This makes it even more delicious and rustic-looking!


I've only used salt & pepper to season my Hole-In-Ones but feel free to get creative by 1. Adding your choice of soft cheese (you would add soft cheese after you've flipped you're Hole-In-One and started to cook the second side, this will allow your soft cheese to sit on top and melt on the already cooked side of the Hole-In-one); and/or 2. Using a bit of thyme, leaves picked (sprinkle the thyme over the yolk while the first side of the Hole-In-One is setting) then flip and cook the second side with the thyme.


When you dig in, the bread should be slightly crisp on the outside and the yolk should ooze out, a delectable little breakfast or brunch snack for anyone who loves dipping bread into egg yolk!


Cooking At Home: A thing called Jellied Eggs


I don't have cable television at home but whenever I have the chance to watch cable at someone else's home I go back and forth between The Food Network and The Cooking Channel. I have a few favorites shows and chefs that I always get excited about but as of late I've been getting excited about someone new, Laura Calder of "French Food at Home", she's charming, she's cute, she's French Canadian, her recipes are interesting and she focuses on cooking french food!

I was interested in one particular recipe that I saw her make, it's something called the jellied egg in which a stock is jellified and in it's mold is a cute little egg. A rather artful piece I have to say. I have tried this jellied concoction not that long ago at a Russian dinner, a chicken stock was jellified and suspended in it's mold were pieces of chicken, while the taste wasn't half bad I just could not get use to the texture, as you might suspect. But! It is a new year and to keep to my new year's goal of spicing up my kitchen life I tackled the jellied egg.

Considering how fantastically showy the jellied egg is (if you can get it to come out right) it is surprisingly simple to make. There are a few tricks to making it come out prettier than mine (more on this later). But first the details of my experience. 

While it was a joy to make the jellied egg I can't say it was a joy to eat it. This time the taste as well as the texture did not suit my palate. The recipe called for beef stock as the base but perhaps a less flavored, lighter-tasting base would have better sufficed, perhaps chicken broth instead? I found the beef stock to be too flavorful, too sharp? Or was it too smokey? Either way... yuck. On top of the terrible jellified beef stock the jelly texture was still too odd to swallow, it's one thing to be eating strawberry jello but beef jello? Ew. And lastly, while I absolutely love hard-boiled eggs, a hard-boiled egg cold and suspended in the middle of jellified beef stock somehow takes away the whole beauty of eating a hard-boiled egg. What a shame that this recipe did not turn out, I was really beginning to like Laura Calder.

However, it was fun to make! and very artful too! Perhaps your palate is more refined than mine and you'll actually like the taste of the jellied egg, so look below (if you're interested).

INGREDIENTS (for 2 servings):
1 - 1 1/2 cups of beef consomme [but Laura Calder used regular beef stock so I did too]

1 Tbsp unflavored gelatine

1 Tbsp Cognac [I omitted this ingredient from my test run, it is optional]

Salt & freshly ground black pepper

2 egg [I was only cooking for two so used 1 egg only]

 8 Fresh tarragon leaves [I did not have access to tarragon leaves so used parsley instead]


DIRECTIONS:
Put the stock in a saucepan and sprinkle over the gelatin. Allow to sit for 5 minutes to soften.

Gently heat the stock on low and stir to dissolve the gelatin - The gelatin will leave specks in the stock, in the process of heating and stirring to dissolve you will see the specks disappear and should end up with a clear brown beef stock.

Turn off the heat and stir in the cognac. Also add the salt and pepper, to taste.

Allow the stock to slightly cool. Pour the thinnest layer in the bottom of each ramekin.

Refrigerate the ramekins until the stock is sticky but not completely set - this took about 20 minutes for mine. Keep the remaining stock mixture out.

While the mixture in the ramekins in the refrigerator are setting hard-boil cook your eggs by putting your eggs in a pot and pour in cold water to cover. Bring the eggs to a boil uncovered. When the eggs come to a boil cover the pot, turn off the heat and allow the eggs to sit as such for 8 minutes. After 8 minutes rinse the eggs under cold water until cool and then peel. Cut the hard-boiled eggs in half length-wise.

When the stock mixture in the ramekins are set, decoratively lay the tarragon leaves on top of the stock mixture with the herb's best side facing down.

Set an egg half, yolk-side against the tarragon on top in each.

Pour over the remaining stock. Refrigerate the ramekins until fully set - this took 40 min to 1 hour for mine.


Although the end product of the Jellied Egg recipe was not suitable to my palate I still felt that it was rather beautiful. But of course there's always room for corrections. Here are a few tips for a more beautiful jellied egg (well, more beautiful than mine).

FIRST use consomme for a clearer gelatin, this is why the beef consomme is called for in this recipe, although I'm not too sure how different the taste is from beef stock.

SECOND use a ramekin or small bowl will straight sides. My bowl was obviously curved which makes it rather difficult to get the jellied egg out. When running your sharp knife around the edges the knife will be able to make a cleaner cut on the sides if your ramekin or bowl of choice has sides that go straight down with no curves.

THIRD take your time and be patient when getting your jellied egg out. If you force your jellied egg when it's not yet ready to let go you'll end up with the picture below...


... therefore, if you're jellied egg isn't ready fill a bowl larger than your ramekin or bowl with hot tap water, set the ramekin or bowl with your jellied egg in the hot bowl of water to allow the jellied egg to warm up just a tad (15 seconds to 30 seconds), then try to take the jellied egg out again. If the jellied egg still is having trouble letting go put it back in the warm bath for another few seconds, keep repeating this step until the ramekin or bowl releases the jellied egg. And while the warm bath will help to coax the jellied egg to let go of the ramekin or bowl it will still need a little bit of jiggling on your behalf.

FOURTH after running a sharp knife around the edge (between the jellied egg and the ramekin or bowl) hold a plate on top of the ramekin or bowl and flip the entire thing upside down so that the ramekin or bowl sits ontop of the plate, this will help greatly in getting the jellied egg out cleanly.


Do you know how to properly brown meat?


Browning meat for me, whether it be chicken or beef, can be a hit or miss for me, and pretty much at the end of it all I have no idea what I did right or wrong. 

There are a few basic rules and if  you've got the same problem I do when it comes to browning meat then I'm pretty sure you and I both know only but a couple of these basic rules.


I'm sure we all know this one, RULE #1 Don't use a non-stick pan. The point is to use a pan that will allow the meat drippings to stick creating browning affect.

RULE #2 Don't use a fork to flip the meat. This punctures the meat allowing the meat juice to escape, this will only dry out your meat in the end.

RULE #3 Take the time to preheat your pan. Preheat your pan thoroughly on low, add the butter, oil or both and then turn up the heat before adding the meat. If the pan is too hot before adding the fat (butter, oil or etc.) the fat will just end up burning.

RULE #4 Dry your meat. Whatever you do, dry your meat  with a paper towel before browning to achieve less oil spits and a nicer brown.

RULE#5 Don't crowd the pan! I'm sure you've heard this one before. A jumble of meat in a pan all piled together will only create a steaming affect. When the juices from the drippings can't find a way to escape (a.k.a. evaporate) there will be no browning only steaming. Brown in batches if you have to, and most likely you'll always have to, unless you're cooking for one or two.

RULE #6 Leave the meat alone! Yes, I know this is hard. But allow the meat to brown thoroughly on each side without interruption. If you find that the meat has stuck to the plate leave the meat alone until it comes off the pan readily.

So those are the basic rules. If you want to know more detailed information all about browning (and I mean everything there is to know about browning) check out this site on browning, how to brown meat @ missvickie, it's loaded with information on the subject, if anything it'll be really interesting.


Cooking At Home: Pea Pesto Crostini


Peas were definitely one of those vegetables that fell into the same category as... lets say, carrots. Uneventful, unimportant, a vegetable that had no real impact what-so-ever, a side vegetable compared  to other vegetables like heirloom tomatoes, which I can definitely get excited about.

However as a way to spice up my kitchen life, I decided this year as a kind of New Year's resolution that I would try to be more adventurous- at this point this means #1- less meat (and for the time being, when I say "less" I mean none at all, the baby I'm carrying doesn't have a taste for flesh apparently), and #2- to cook and make things that I don't usually. I often read a recipe and decide in my mind whether that recipe would taste good or not which ultimately is the way in which I decide what to make. This year I've made up my mind to accept the fact that there's a lot I don't know about taste and flavors and it's not for me to decide whether it tastes good or not until I've tried it, which means... cooking it.

So with the adventurous spirit of my New Year's resolution in mind I decided to make a dish featuring PEAS! And I will tell you this now, I will never see peas the same way ever again.

I decided to make Pea Pesto Crostini from Giada De Laurentiis' cookbook Giada At Home, Family Recipes from Italy and California. Explained in simpler terms the recipe is a toast spread made of peas. The beauty of this recipe is that it is absolutely ABSOLUTELY delicious, and simple to make, AND, uses but a few ingredients!  In this way the Pea Pesto Crostini is a great dish to put out for parties and a great dish to put together if you're in need of a little bit of something else on the table but regardless of why it will be the talk of dinner, and of course it's beautiful green color doesn't hurt.


I made the Pea Pesto Crostini and naturally did not know what to expect, I've never in my life had a dish featuring peas before. I took a small spoon to do a taste test, I could have stood there eating spoonfuls had it not been for my will-power, yes, that good. I never knew peas were sweet, this pea pesto is obviously playing off the natural sweetness of the peas, the garlic which hardly noticeable at all lent a tad of bite that was barely discernable, the olive oil gave the pea pesto a luxurious consistency that also lent the dish moistness, and the tang of the parmesan combined to make beautiful music with the sweet roughly pureed peas. Served on top of thick bread that was crisp on the outside and chewy on the inside was absolute heaven! As a dipping for cucumber spears, the pea pesto was also fantastic! I will never see peas the same way every again.


INGREDIENTS for 4-6 servings:
1    (10-ounce) package of frozen peas, thawed - I used Trader Joe's Organic frozen peas (16-ounces), they were so sweet and delicious

1    Garlic clove - I used two garlic cloves since I love garlic and I was also using 6-ounces more peas than the recipe was asking for, it was perfect

1/2 Cup freshly grated parmesan cheese

1    Tsp salt, plus more to taste

1/4 Tsp freshly ground black pepper, plus more to taste

2/3 Cup olive oil

8    (1/2-inch thick) slices whole-grain baguette or ciabatta bread, preferably day-old - I didn't have a baguette or ciabatta so I used what I had, whole grain sunflower seed bread, it was more than fine! Fantastic even!

8    Cherry tomatoes, halved, or 1 small tomato diced - the cherry tomato garnish is optional


DIRECTIONS:
1. Pulse together in a food processor the peas, garlic, parmesan cheese, salt, and pepper. [I would suggest using 1/2 the salt asking for and then add more after tasting the pesto when you are half-way through making it. Some parmesans are saltier than others and if you have really flavorful peas you may not want to drown that out with too much salt, always remember you can always add more but taking out is a little bit harder to do, especially with salt].

2. With the machine still running, slowly add 1/3 cup of olive oil and continue to mix until well combined, 1-2 minutes more. [I used less olive oil, I simply drizzled in olive oil and stopped when I felt the consistency had reached the point where it was just right for me. The more olive oil you use the more smooth the pesto will be, I personally like mine with a bit of texture so used less olive oil].

3. Season with more salt & pepper if needed.

4. Preheat a stovetop griddle or grill pan over med-high heat.

5. Brush both sides of each of the bread slices with the remaining 1/3 cup olive oil and grill until golden 1-2 minutes.

6. Top each slice of crostini with 1-2 tablespoons of the pea pesto and top with 2 tomato halves. [Topping with tomatoes are totally optional, I simply cut my tomatoes in half and put them on the side].


Did you know caffeine in coffee can alleviate your aching head?


I forget where I first heard it from, that drinking coffee can make a headache go away, at this point it must be common knowledge, but, if you happen to be that one person that doesn't know about this here goes... a cup of black coffee can make your headache go away. The caffeine in coffee also an ingredient in many over the counter pain relief medication is what causes this glorious effect!

I have tried this, I occasionally (perhaps more than I like) get headaches, I often turn to my medicine cabinet for relief but a cup of black coffee also does the trick I find. So next time you've got an aching head and can't get to a drugstore but just happen to be standing near a coffee shop... you know what to do.


The Art of Simple Food by Alice Waters


The latest cookbook I bought myself, The Art of Simple Food by Alice Waters which has a total of 405 pages has been a god-send to my kitchen. What I've learned from cooking meals at home is that I lack the most basic knowledge on cooking, for example, how do you boil asparagus to get it just right? Of course I know that one has to have boiling water and that one must put the asparagus into the boiling water in order to boil asparagus, but for how long does the asparagus need to boil? And what is the appropriate way? Do you begin with the asparagus already in the water before it begins to boil or do you add the asparagus into already boiling water? Do you salt the water? I have so many basic questions on cooking, and funny enough the answer is pretty difficult to find, sure you can hop onto the web and throw the question out there into the void but out pops up 10 different answers! And so you find yourself back to square one: how do you perfectly boil asparagus?

So what is it that you suppose I love so much about Alice Water's The Art of Simple Food? The answer is: the fact that this cookbook takes the time to go over the basics, and I mean, the basics. In this way this particular cookbook is a great starter for beginner cook-enthusiasts. Naturally you can't expect to find all your answers to all your basic questions, that would require a cookbook of many thousands of pages, but this cookbook does a pretty good job in covering the general basics of cooking different kinds of meat and vegetables as well as covering the basics on sauces, desserts, soups, broths, breads, salads, legumes and pastas.

An important note to keep in mind is that The Art of Simple Food is not a cookbook full of recipes (as most cookbooks tend to be). The Art of Simple Food is a cookbook that focuses on teaching you how to cook. Each items (whether it be meat, vegetable or etc.) begins with an intro which covers the basics of the item including how to cook them, this then transitions into a couple of simple recipes for said item. This will be all the more clear to you as we continue our review accompanied with pictures (below).


THE BACK COVER


The cookbook begins with a list of kitchen staples and then goes on to cover each item on the list in detail: why one should have it, what it is used for, how it should be kept for longevity, where one can get it, and whole bunch of other great information.


The chapter that covers Artichokes is but two pages long, and this will be the case for many of items covered in this book. While the recipes and basic information will be different for each item, the approach to each item is pretty much the same. The cookbook will begin with an introduction (as you can read and see in the picture above), the book will then go into detail of how you can cook the item (in this case, artichokes); Waters covers here boiling and steaming artichokes as well as giving a couple of recipes that covers braised artichokes and sauteed artichokes with onions, garlic, and herbs (as pictured below)


And to make my point, another example; this chapter covers Tomatoes, and as you can see in the same general approach.


Cooking At Home: Tomato Basil Feta Salad over Grilled Portabello


Obviously a recipe for the mushroom lover.  Fresh flavorful tomatoes are diced and tossed with chiffonades of fresh basil, crumbles of tangy feta cheese, olive oil and seasoned with salt & pepper. The tomato mixture tops a large grilled portobello mushroom.  The fresh topping accessorizes the feature of this appetizer, the earthy meaty mushroom, perfectly.  A simple, easy-to-make appetizer that can wow your dinner date, just make sure they like mushrooms.


INGREDIENTS NEEDED:
2 large portobello mushrooms, wiped cleaned and stems removed
2 ripe roma tomatoes
3 Tbsp of crumbled feta cheese
4 leaves of fresh basil, cut in chiffonades
olive oil
salt and pepper


RECIPE:
1.  In a large bowl add the diced roma tomatoes, olive oil to coat, salt and pepper to taste and toss all together. Set aside.
2.  Heat a large heavy-bottomed skillet/pan over med-high heat.
3.  In the meantime drizzle olive oil on both side of the the portobello mushroom and pat to spread, season with salt and pepper.
4.  Add the mushrooms to the hot pan top-side up (or round-side up), allow the mushroom to cook for about 3-5 minutes (check the underside occasionally to make sure the mushroom is browning and becoming softer).
5.  Flip the mushrooms over to brown and soften the other side. When the mushrooms are fully grilled, you want them to be soft so as to be easily cut with a knife, they are ready.
6. Take the mushrooms off the pan and set aside stem side down on a plate lined with a paper towel, this will allow them to slowly give off any excess mushroom liquid.
7.  In the meantime, in your tomato mixture, add the chiffonades of fresh basil and crumbled feta, fold this mixture together carefully, taste and season with salt & pepper if needed.
8. Plate your mushrooms stem side up, and top with a generous scoop of the tomato mixture.


Do you know how simple it is to cook asparagus?


Today I sat down to lunch with Brother Charlie at a small cafe across from his new dig downtown. Having lived at home with Mom and Dad for most of his life he is unaccustomed to cooking, although he rather does love to eat. He shared with me while I hungrily chowed down a bowl of vegetarian chilli (as only a pregnant lady could) that he and his wife cooked dinner last night. She made the braised chicken and he a side of brussel sprouts, the brussel sprouts did not turn out well- this, funny enough, did not surprise me. For a first time cooker brussel sprouts would not be the first vegetable I would suggest trying to cook. I told him instead to try cooking asparagus, it is fantastically and appallingly simple to cook (using the boiling method)< this is the vegetable suggestion I would make to all bachelors and/or first time cookers. Asparagus is a seemingly sophisticated vegetable that can dazzle any visitor.

So, how easy is asparagus to boil? Literally, it's as simple as one-two-three...

1st STEP:  Add a tablespoon or so of salt (it does not have to be exact) to enough water in a pot large enough to hold all your asparagus, bring this salted water to a boil.

2nd STEP:  Add your trimmed asparagus to the boiling pot of water for 3 minutes and 15 seconds (by trimmed I mean, snap off the hard ends of the asparagus).

3rd STEP (optional):  Dunk your asparagus in a bowl of ice-water to set the color and stop the cooking (I usually skip this step mostly due to laziness).

DRESSING THAT BEAUTIFUL ASPARAGUS:  Lay your asparagus out on a plate, drizzle with good olive oil and sprinkle with salt and freshly cracked pepper. If you want to get fancy you can shave a few strips of parmesan cheese on top (use a speed peeler for this, it works wonderfully for shaving cheese).


LinkWithin

Related Posts Plugin for WordPress, Blogger...